Skip to content

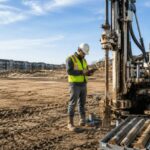
Soil testing is the process of collecting samples and measuring in-situ properties of the ground to determine its strength, compressibility, permeability, and chemical behaviour. The goal is to design a foundation that is safe, economical, and durable.
Without testing, designers must use conservative assumptions, which often inflate costs, or optimistic ones, which risk failure. Testing replaces assumptions with data. It also reveals hidden hazards: soft pockets, groundwater, fill, buried streams, expansive clays, aggressive chemicals, or weathered rock that varies with depth.
Stage One: Desk Study and Site Walkover
A good investigation begins before any drilling. A desk study reviews geological maps, past site uses, nearby reports, rainfall patterns, and flood history. A site walkover then looks for surface clues: cracked ground in dry weather (a sign of expansive clay), standing water, vegetation changes, nearby cracked buildings, slope movement, quarry scars, or previous filling.
These observations help the geotechnical engineer plan the number and position of test points, and anticipate the likely ground conditions. In Kenya, geological knowledge is especially valuable: the Nairobi area sits on volcanic rocks and tuffs, while the Lake Victoria basin, coastal belt, and Rift floor each have characteristic soils.
Stage Two: Field Investigation Methods
Field work physically explores the ground. Common methods include:
- Trial pits: excavations, usually 2 to 4 metres deep, that let engineers see the soil profile directly, take bulk and block samples, and observe groundwater. They are cheap and useful for houses and shallow foundations.
- Auger and percussion boreholes: used to reach greater depths in soil and weathered rock, with samples taken at intervals.
- Rotary core drilling: used where rock must be sampled to assess strength and fractures.
- Dynamic Cone Penetrometer (DCP): a quick, low-cost test that estimates soil strength with depth, often used for roads and light structures.
- Standard Penetration Test (SPT): the most widely used in-situ test for building foundations, discussed in detail in a separate article.
The choice of method depends on structure type, depth of influence, and ground conditions.
Stage Three: Sampling
Two kinds of samples are collected. Disturbed samples are broken up during extraction and are good for classification tests such as particle size and Atterberg limits. Undisturbed samples keep the natural structure and are needed for strength and consolidation tests. Samples must be properly labelled, sealed to preserve moisture, protected from heat and impact, and delivered promptly to a competent laboratory. Poor sampling produces unreliable results regardless of how good the laboratory is.
Stage Four: Laboratory Tests
Laboratory tests turn samples into numbers. The most common include:
- Moisture content: the water present in the soil, which influences strength and volume change.
- Atterberg limits (liquid limit, plastic limit, plasticity index): indicate how plastic and potentially expansive a clay is.
- Particle size distribution (sieve and hydrometer): classifies the soil as gravel, sand, silt, or clay.
- Compaction tests (Proctor): determine the optimum moisture content and maximum dry density for fill and subgrade.
- California Bearing Ratio (CBR): measures subgrade strength for roads and pavements.
- Shear strength tests (direct shear, triaxial, unconfined compression): give the cohesion and friction angle used to compute bearing capacity.
- Consolidation (oedometer) test: predicts settlement in clays.
- Chemical tests: sulphates, chlorides, and pH, which affect concrete durability and steel corrosion.
Not every project needs every test. A well-planned programme is targeted to the structure and ground.
Stage Five: Analysis and Reporting
The engineer combines field and laboratory data to build a ground model: layers, thicknesses, strengths, and groundwater. From that, the report recommends a foundation type (pad, strip, raft, piles), the founding depth, the allowable bearing pressure, expected settlement, and special measures such as soil replacement, drainage, or chemical protection for concrete.
A proper report also states limitations, such as the fact that boreholes sample only a small part of the site. Read those caveats carefully, and tell your engineer if conditions during excavation differ from the report.
How Soil Test Results Influence Design
Results translate directly to cost and safety. A firm layer at shallow depth may allow simple pad footings. A soft layer overlying firm ground may require deeper footings or piles. Expansive clay calls for specific foundation approaches. High groundwater may require dewatering or waterproofing. Aggressive soil chemistry may need sulphate-resistant cement or protective coatings.
For roads and pavements, CBR and compaction data determine subgrade improvement and layer thicknesses. For retaining walls and slopes, shear strength and groundwater data drive stability checks.
How Many Test Points Do You Need?
There is no single number. As a general principle, small residential plots may need two or more pits or shallow boreholes, while larger buildings need points spread across the footprint, commonly at or near corners and heavily loaded zones. Variable ground requires more points than uniform ground. The depth should extend through the zone of significant stress beneath the foundation, often one and a half to two times the foundation width for shallow foundations, and deeper for piles.
Timing, Cost, and Seasonal Considerations
Fieldwork for a small house may take a day or two, and laboratory testing and reporting typically one to two weeks. Larger projects take longer. Costs depend on the number of points, depths, tests, and location.
Season matters. Testing in the dry season can reveal a lower water table than occurs during rains, so the engineer should account for seasonal rise. In expansive soils, moisture conditions at the time of testing affect measured behaviour, so the interpretation should consider wetting.
Common Mistakes to Avoid
Avoid using a single shallow pit for a large building, relying on a neighbour’s results, testing only the surface soil, selecting a provider on price alone, or filing the report without giving it to the structural engineer. Another mistake is excavating the foundation and then ignoring soft zones found on site. Always have the engineer inspect the excavation before concrete is placed.
Frequently Asked Questions
Can I test soil myself? Simple observations help, but they cannot replace professional testing for foundation design.
Is soil testing required by law? Requirements depend on the building type and county approvals, but engineers routinely require it for multi-storey and commercial buildings.
Does one soil report last forever? It applies to the tested site and conditions. If the site is altered by major filling or excavation, or the building design changes significantly, revisit it with your engineer.
Soil Testing for Different Types of Projects in Kenya
The scope of testing should match the project. For a single-storey house on firm ground, a few trial pits and basic classification tests may be enough. For a storey building, boreholes with SPT, plus Atterberg limits and shear strength tests, are the norm. For boundary walls and perimeter fences, which are vulnerable to swelling clays, Atterberg limits and swell tests are particularly valuable. For septic tanks, soak pits, and water tanks, permeability and groundwater information matter as much as strength. For retaining walls and sloping plots, shear strength and groundwater data drive the design. For roads and parking areas, CBR and compaction tests are essential.
Reading the Soil Description in Plain Language
Soil reports use standard descriptions that are easy to decode once you know the pattern. “Firm brown silty clay with gravel” tells you the consistency (firm), colour (brown), main soil type (clay with some silt), and an additional component (gravel). “Dense reddish sand” indicates a compact granular soil. “Dark grey, stiff, fissured clay” is a classic description of black cotton soil. Terms such as “weathered tuff” or “highly weathered rock” indicate the rock has broken down but retains some structure. When the report mentions “made ground” or “fill,” treat it as a warning that the surface layer is not natural and may be unsuitable for support.
Key Takeaways
Remember three practical points. First, the soil report should reach the structural engineer before design begins, not after. Second, the founding level in the report is a recommendation that must be confirmed in the excavation by an engineer. Third, testing is cheapest when done early, before layouts are fixed and money is committed. Treat soil testing as the first design step of your project, and the rest of the construction process becomes more predictable, safer, and more economical.
Conclusion
Soil testing before construction is the foundation of a safe, economical building in Kenya. It reveals the true nature of the ground, guides foundation choice, prevents costly surprises, and supports approvals. Plan it early, choose a competent provider, insist on a clear report with recommendations, and make sure the findings reach the people who design and build. The cost is small compared with the cost of getting the ground wrong.